Quality usually starts slipping long before anyone notices. This happens because there is simply too much to review.
The Quality Evaluation Agent is built into Microsoft Dynamics 365 Customer Service and Contact Center. It brings quality checks into the day-to-day flow of service work so you don’t have to rely on manual reviews.
Let’s find out what it does and how to use it.
How the Quality Evaluation Agent Actually Works
The Quality Evaluation Agent is a built-in AI agent that reviews customer interactions at scale. It runs inside Microsoft Dynamics 365 Customer Service and Contact Center and looks at both cases and conversations.
It is mainly used by quality managers, supervisors, and service administrators who need a realistic picture of service quality without manually reviewing records all day.
The agent automatically checks interactions against quality rules you set. Each evaluation produces a short summary, a clear score, and practical coaching suggestions.
It works by reading real case and conversation records and runs automatically based on triggers such as case or conversation closure.
Once set up, it keeps quality checks consistent and unbiased across all eligible records.
How to Enable the Quality Evaluation Agent
Source: Microsoft Learn
Before you begin, make sure you have access to the Copilot Service admin centre, the appropriate quality or supervisor roles assigned, and Copilot credits available for AI evaluations.
To enable the agent:
- Open the Copilot Service admin center.
- Go to Customer Support, then Quality management.
- Select Manage next to Quality Evaluation Agent.
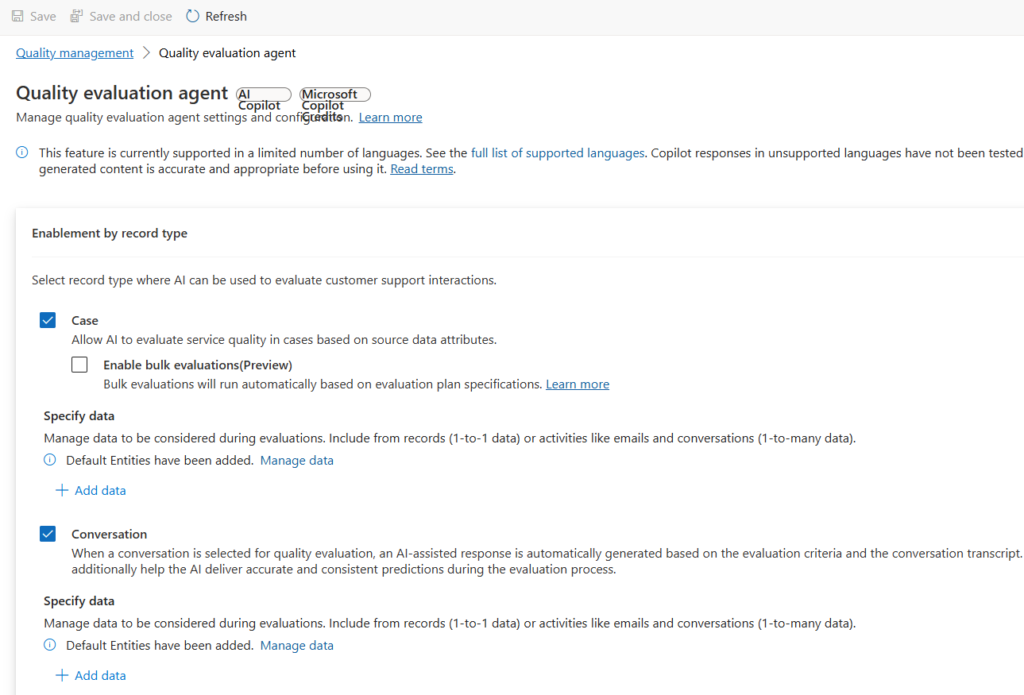
On the enablement screen, choose what the agent should evaluate:
- In Enablement by record type, select Case for case evaluation or Conversation for conversation evaluation.
- If you want the agent to review multiple records automatically, select Enable bulk evaluations (preview).
Next, define what data the agent should use:
- Select Manage data to review the default case and activity fields.
- Remove any fields you do not want included or add additional fields that give better context for evaluations.
Finally, turn on scoring:
- In the Evaluation criteria score, select Enable scoring for criteria.
- Confirm by selecting Turn on. Once enabled, scoring cannot be turned off.
- Choose a threshold value out of 100 to define what counts as good or poor quality.
- Select Save to complete the setup.
Once saved, the agent is enabled and ready.
From this point on, quality evaluations will run automatically in the background based on your criteria and evaluation plans.
Configuration Steps After Enablement
Source: Microsoft Learn
Once the agent is enabled, you should configure a couple of additional settings so it works smoothly with the rest of your service environment.
Before going further, make sure your environment has the required connection references set up. These are links that let the evaluation agent reach essential services such as Microsoft Dataverse and Copilot Studio, which the evaluation flows rely on to run properly across records and AI services.
Here are the configuration steps to complete after enabling the agent:
Setting Up Service Connections
The agent relies on connection references to access data and AI services.
- Open Power Apps.
- Go to Solutions > Default Solution > Objects > Connection References.
- Review the existing connection references.
- Add any missing references required by the Quality Evaluation Agent, like Microsoft Dataverse connection or Microsoft Copilot Studio connection.
Activating Evaluation Flows
Evaluations will not run unless the required flows are active.
- Open Power Automate.
- Search for the flows used by the Quality Evaluation Agent.
- Locate flows such as:
- QEA On-Demand Evaluation Case for case evaluations
- AI Evaluation Flow for Conversation for conversation evaluations
- Turn each required flow on.
Making the Agent Live (if needed):
This step ensures the agent logic and AI behaviour are active.
- Open Microsoft Copilot Studio.
- Locate the Quality Evaluation Agent configuration.
- Check whether the agent and its components are already published.
- If not published, select Publish to activate the agent.
Once these steps are complete, the Quality Evaluation Agent is fully connected and operational. From this point on, it can run evaluations automatically using the criteria, thresholds, and evaluation plans you configured earlier.
Conclusion: Quality Management That Finally Scales
Quality usually fails because manual checks cannot keep up with real service volumes.
The Quality Agent changes that by making quality reviews part of everyday operations instead of an occasional exercise. Once it is enabled and configured, it quietly does the work that teams never had time to do properly.
With this shift, you can see how cases and conversations are really handled, where standards are slipping, and where coaching will make the biggest difference.